

- by Lux
Here's an example VR music video made in Flipside. It's a song called "So Tired" by Flipside's CEO sung by a zombie, who, you can imagine, may be a little tired of his undead existence.
@johndeplume Someone's got a case of the Mondays 🙄 Words & music by Johnny Broadway Music video by Rachael Hosein Watch it in VR on Flipside (https://www.flipsidexr.com) #newmusicalert #newmusic #artistsoftiktok #indiemusic #indie #music #musicvideo #animation #motioncapture #xr #vr #quest3 #metaquest3 #immersive #madeinflipside ♬ original sound - Johnny Broadway
It's also best viewed in Flipside, where you get a front row seat to the graveyard punk performance, so we recommend you hop into Flipside on your Meta Quest 3 or Pico 4 VR headset, but the video is pretty good too.
Here's how to make a VR music video like that for your own songs (or ones generated with AI apps like Suno AI).
The first step is to export the lead vocal stem file from your song. This way you have the original song file and a second file with just the lead vocals.
If you've recorded it yourself, this can be done by muting all tracks except the lead vocal in your DAW and exporting that as a new WAV file.
If you don't have access to the original recording files, you can use the free StemRoller app to separate the tracks for you. StemRoller will separate out the vocals as well as the bass, drums, and other instruments, but for our purposes we just need the vocals.wav file that it generates.
You should now have two audio files:
Log into the Flipside Creator Portal then click on the Audio tab and upload these two files to your private audio collection in Flipside.
In Flipside, you can either record the animated band members together with friends over multiplayer, or record them one after another by adding a part successively for each band member.
One thing to note: There is currently a bug preventing props from being added to a recording after the fact, unless you add it mid-recording but then it will pop in at that time, so any props you need at the start of the recording you'll need to take out and have ready in the initial recording.
In the Sets menu, choose a set you want the performance to be on, set up your props so they're located where you want and can be easily used when recording the performance itself.
You should now be on set and almost ready to record. Let's start with the lead singer part, assuming you're recording alone.
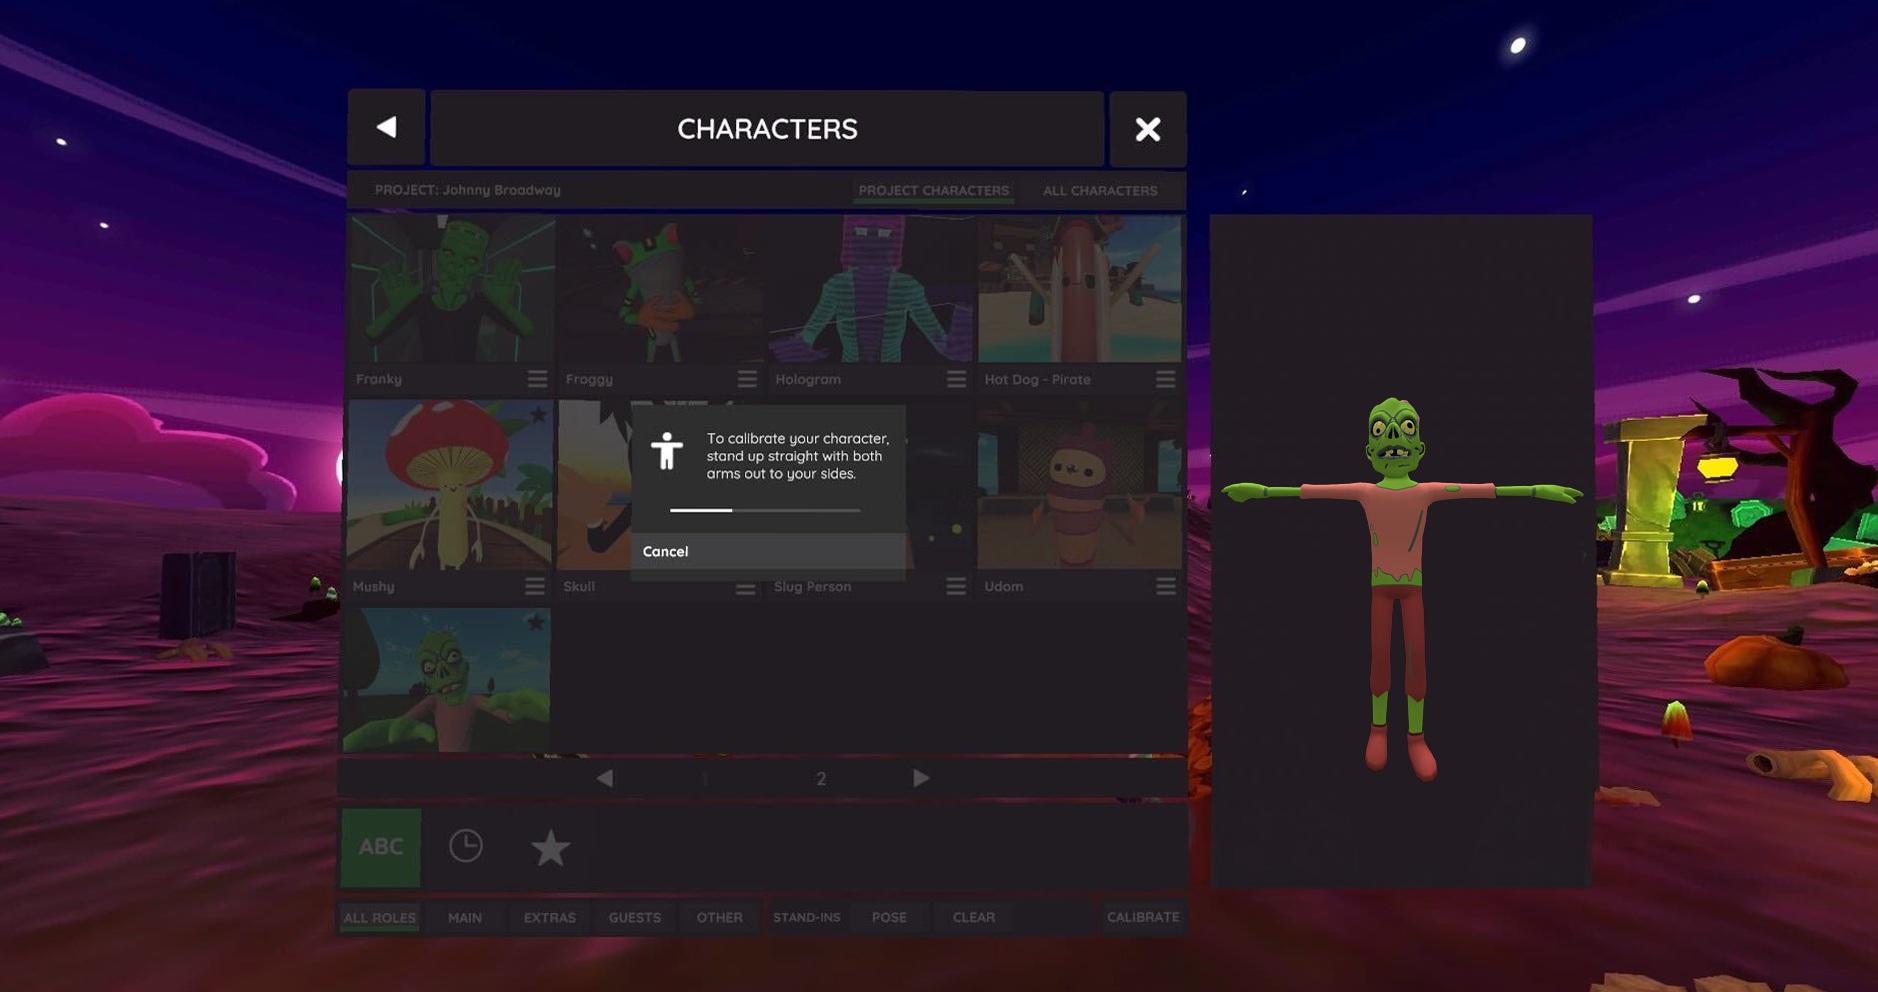
Go to the Characters menu and choose the character you want to perform the lead. It's also a good idea to calibration at this time, so click on the Calibrate button in the bottom right corner of the Characters menu then stand in a T-pose for a few seconds as instructed.
On the main menu, choose Audio Browser then go to All Audio > Imported. You should see the two audio tracks you uploaded through the Flipside Creator Portal earlier. Click on each one and choose Add to Audio Controller.
Next, click on the audio track that has the lead vocal only and choose Voice from the drop down menu. This will ensure that track powers your lead singer character's voice as you record.
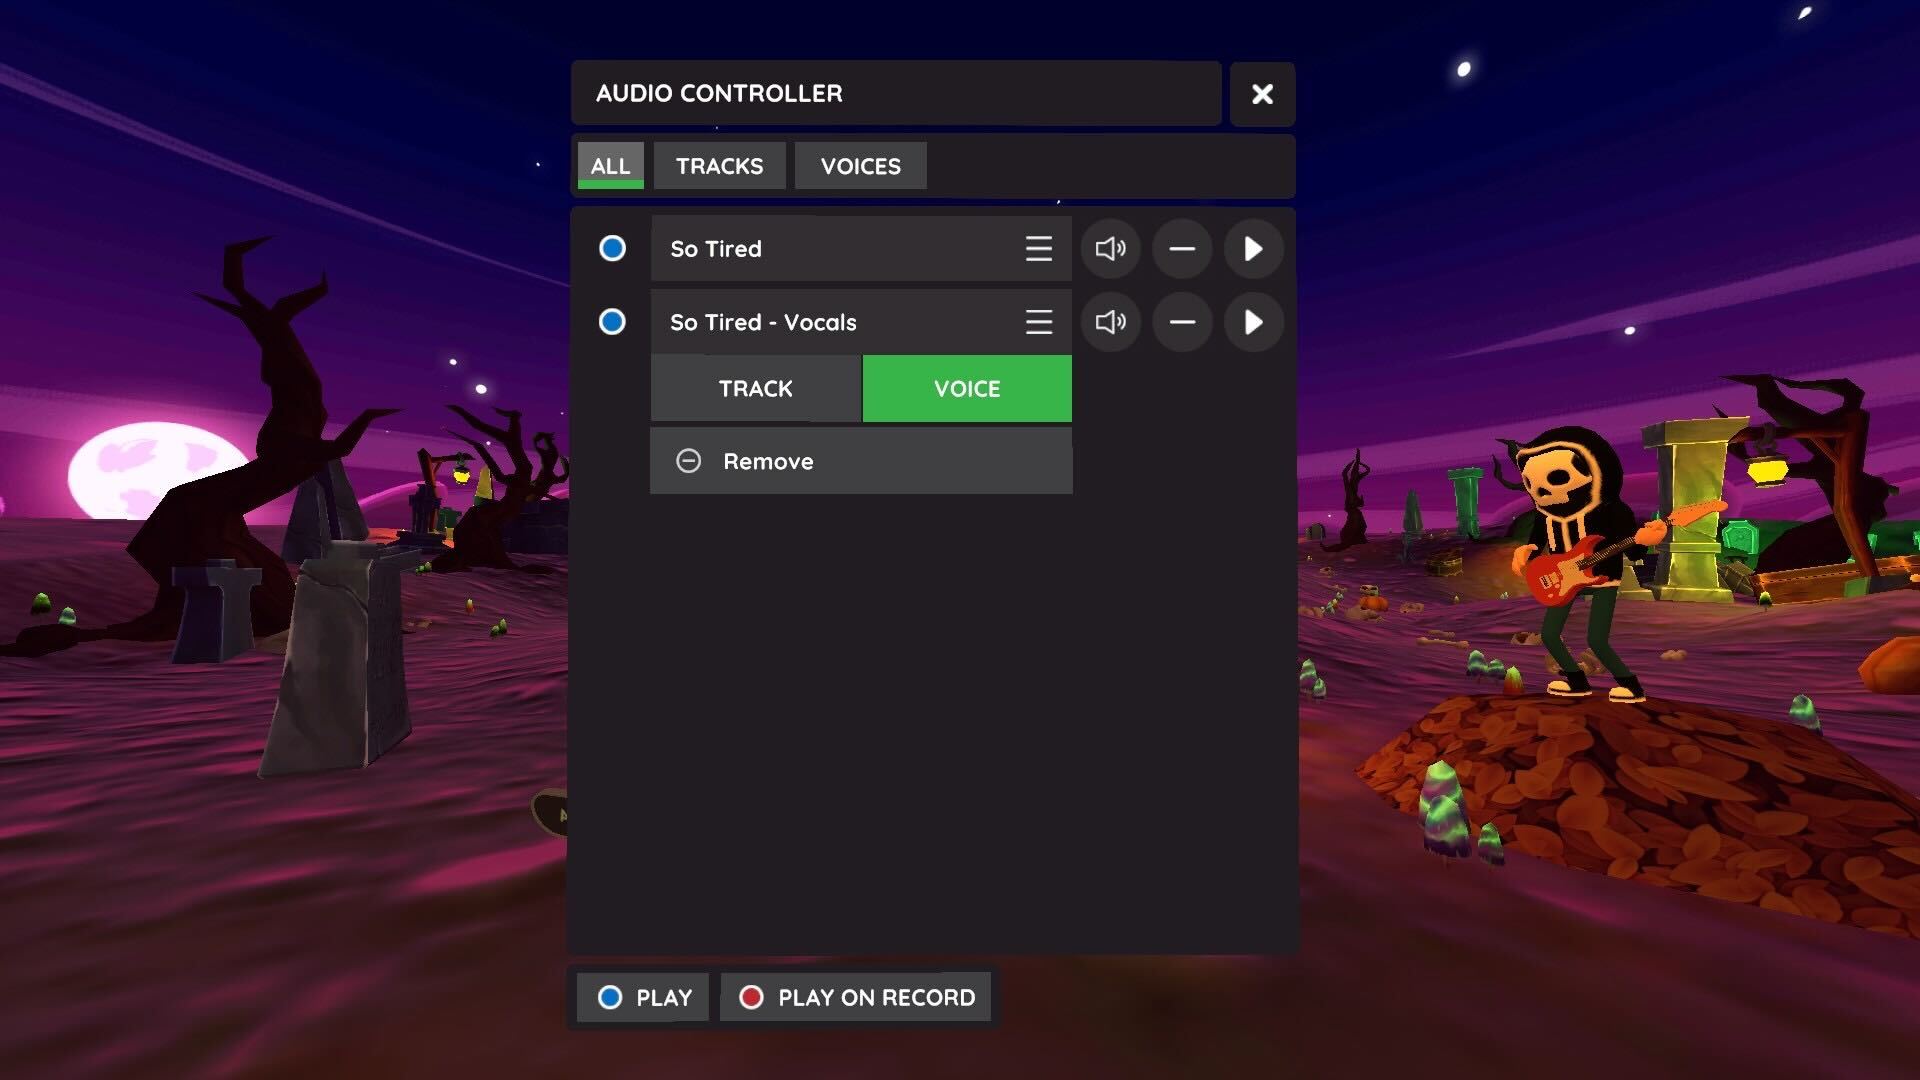
Next, on the Audio Controller, check the checkbox next to each so they're both selected to play in sync.
Lastly, click Play on Record to ensure they'll both start playing automatically at the start of your recording.
Get your character into position to start the recording, grabbing any props you need like the microphone, for example, then on the main menu click Record and wait for the countdown.
With the lead vocal track powering your character's voice, you're free to focus on performing the physical parts of the performance.
When you're finished, click Stop then choose to Keep the recording.
Once the recording is finished being saved, load the recording and click the Mute icon next to the lead singer's part so the lead vocal is no longer heard doubled, since we only needed it to power the mouth movements.
If you're overdubbing parts for additional band members, you can now change characters, get into new positions, and choose Add New Part. Do this until the recording is complete.
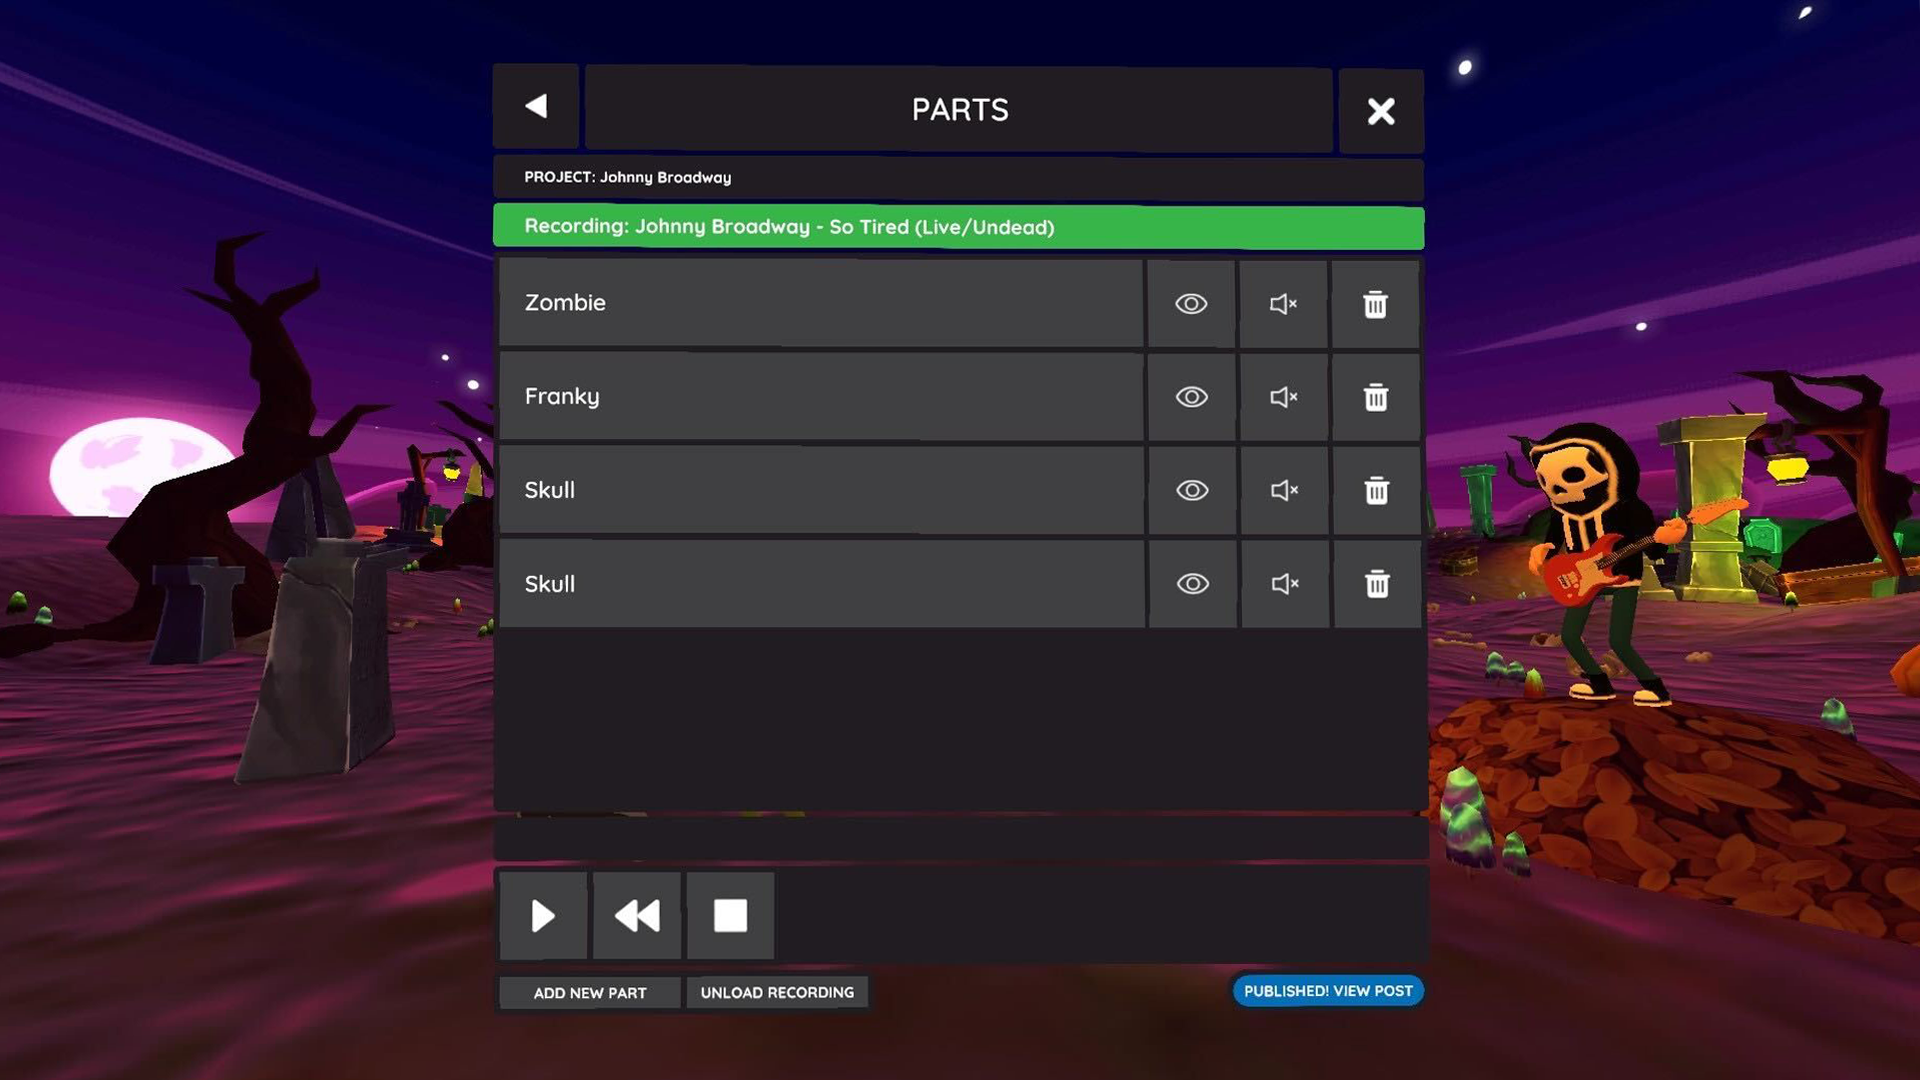
If you've made it this far, you probably have a brand new VR music video on your hands which you can publish to your channel using the Publish button when you have that recording loaded.
You've now created a VR music video people can watch and feel like they're right inside the experience.
Have fun!
 Join the Community
Join the Community
Join the Community